
Standard window sizes vary by window type and manufacturer. A U.S. catalog might list a 30 × 48 in casement and a 60 × 36 in sliding window. For a quote, start with your drawings or site measurements and label what each dimension represents.
Standard window sizes by type
Read each size as width × height. Some U.S. catalogs use a four-digit code. For example, 5030 means 5 ft 0 in wide and 3 ft 0 in high. The code can refer to an opening or to a window unit, depending on the catalog.
| Window type | Example sizes in inches | Approximate sizes in mm |
| Casement | 28 × 42 in | 30 × 48 in | 711 × 1,067 | 762 × 1,219 |
| Sliding | 36 × 24 in | 60 × 36 in | 914 × 610 | 1,524 × 914 |
| Fixed or picture | 48 × 60 in | 72 × 48 in | 1,219 × 1,524 | 1,829 × 1,219 |
| Awning | 36 × 24 in | 48 × 28 in | 914 × 610 | 1,219 × 711 |
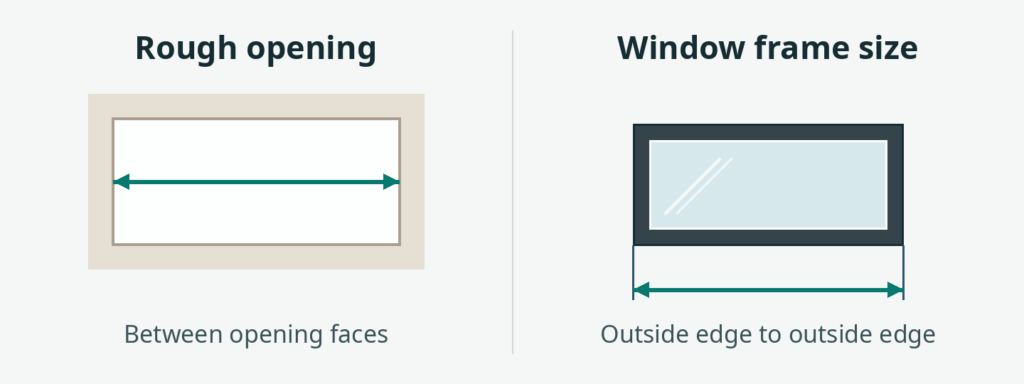
Rough opening and window frame size
When you compare standard window sizes, check which dimension the supplier lists. On site, identify which surfaces will receive the new window before you take measurements.
Rough opening. This is the opening in the framed or masonry wall that will receive the full window unit. Take measurements between the opening faces at the intended installation plane.
Frame size. This is the overall width and height across the outside edges of the main frame. Confirm how the supplier lists any fins, extensions or subframe.
Clear opening. This is the usable space with an operable sash open. Ask for the clear dimensions of the chosen configuration if you need to check ventilation or emergency exit requirements.
Choose the measurement points for a replacement
For a full-frame replacement, the installer may need to verify the opening behind the old frame. If trim conceals it, record the visible measurements and label where you took them. If the old frame will stay in place, measure the opening inside the retained frame at the points specified for the new system.
Label each opening with the window ID from the drawing, such as W-03. Measure each one separately. Two windows that look the same can have different site dimensions. If the opening has yet to be built, mark the drawing revision and label the size as planned.
How to measure a window opening
Set up a tape measure, a level and a copy of the window schedule or a simple sketch. Record the readings in one unit and keep the tape in the same plane for both directions.
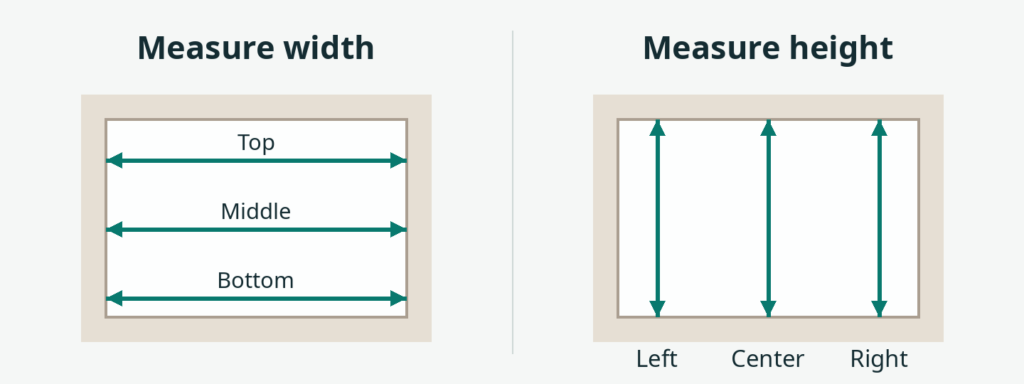
Width. Measure horizontally between the left and right opening faces near the top, at the middle and near the bottom. Keep all three readings and mark the smallest.
Height. Measure from the sill to the underside of the head at the left, center and right. If the sill slopes or includes a recess, confirm which surface the new frame will sit on. Mark the smallest height reading.
If the frame will sit back from the outside wall face, take the readings along that line. A splayed opening can give different measurements at the front and back.
Example readings for one opening
| Width reading | Result | Height reading | Result |
| Top | 1,202 mm | Left | 1,503 mm |
| Middle | 1,198 mm | Center | 1,499 mm |
| Bottom | 1,200 mm | Right | 1,501 mm |
Check squareness and installation depth
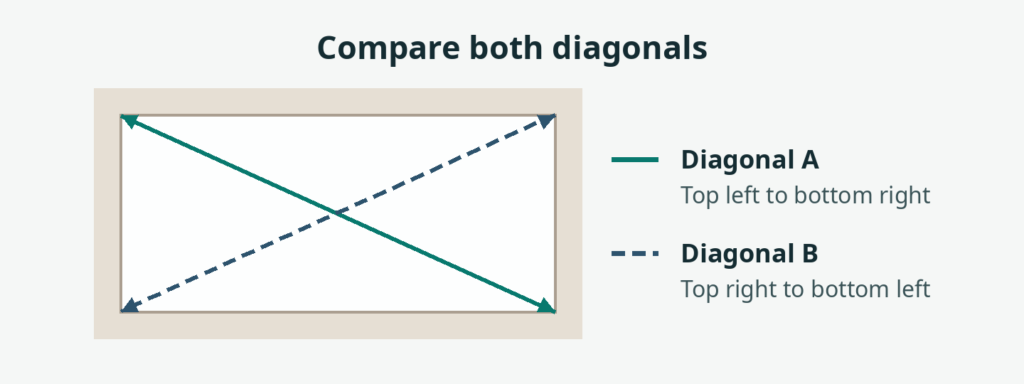
Measure both diagonals at the same plane and record any difference. Use a level along the sill and head, then check whether the sides are plumb. Tell your supplier if the opening tapers or the sill needs correction before final measurement.
Measure the usable depth from front to back where the frame will sit. Liners, trim and wall finishes can reduce this space. Share a sill or jamb section if the frame must align with a particular finish or drainage detail.
How much space should you leave around the frame
Installation clearance depends on the selected window system and the wall, attachment and sill details. Share the raw measurements first. Have your installer verify the opening and review the agreed frame size on the shop drawing before fabrication.
What if the drawing and the site size differ
Identify the affected opening on the drawing and send the field readings with a marked-up photo. The project team can then confirm whether to adjust the opening or the window layout.
If several windows share an elevation, mark any head or sill lines that need to align. Send the full elevation with the individual measurements so all the frames can be reviewed together.
What to send for an aluminum window quote
If you already have drawings, send the window schedule and elevations first. If the opening is already built, add your site readings and photos. These details help Lexia Aluminum review each opening and quote the right window configuration.
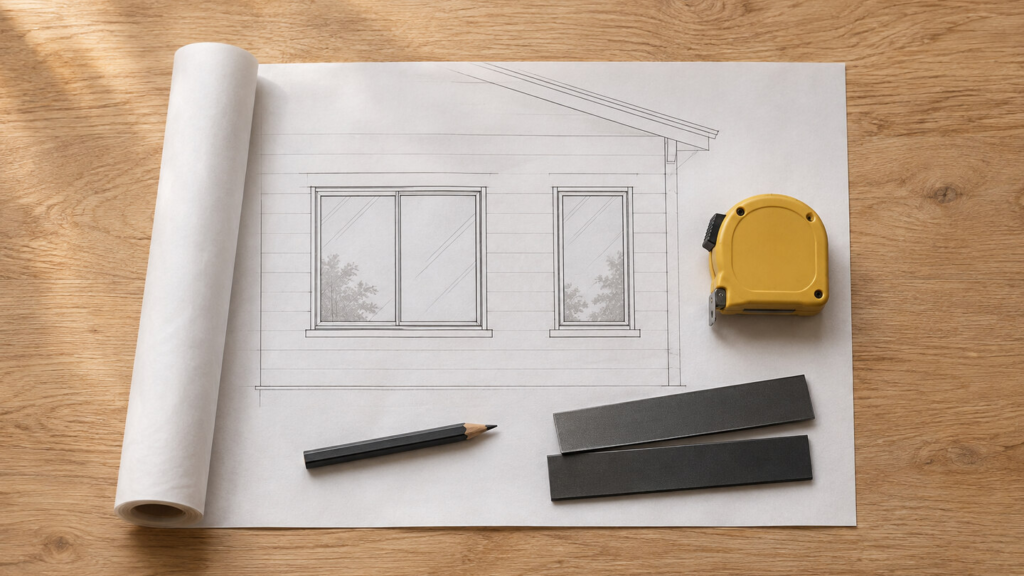
- Opening ID, quantity and width × height. Include the units and label each size as a rough opening, retained-frame opening or specified frame size.
- Window type and operation. Mark fixed and opening sections and any preferred opening direction.
- Glazing, frame finish and insect screen preferences, plus any performance requirements listed on the drawings.
- Project city and country, with a straight-on photo or a marked-up sill or jamb detail where space is tight.
For example, you could write “W-03, kitchen, quantity 1. Minimum rough opening 1,198 × 1,499 mm. Project in Calgary, Canada. Please quote an outward-opening casement window with an insect screen and a charcoal finish. Elevation and six site readings attached.”
Send us your drawings, sizes, or site photos. Tell us where the project is and which aluminum window systems you’re considering.
Planning a patio opening too? See our guide to sliding doors vs bifold doors for large openings.